Here is the link to the VIDEO http://www.youtube.com/watch?v=wIIfoUPWymQ
Hanging up the valve edge to partially inflate the balloon for tying in the parachute
A little air anyone?
It's ALIVE!
Finished tying in the top.
Upper and Lower parachute line with pulley and bridle lines.
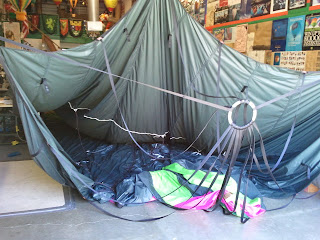
Interior shot of the balloons first partial inflation
Inside my balloon
Attached the suspension cables
Another shot inside the balloon
The beginning of my envelope bag. It will be made of ballistic nylon and will have green and pink diamonds on the sides.

I only have three final things to install on the balloon! My carabiners, my turning vent lines and my thermistor wire. Those should only take me about two hours to complete. Once I have that done, I will complete my envelope bag and pack it up. It might take a few weeks to begin working on my lower end but I look forward to working with the stainless steel tubing. Check back in a few days for another update.


No comments:
Post a Comment